[ Original interview in English below | Traduction française à cette adresse ]
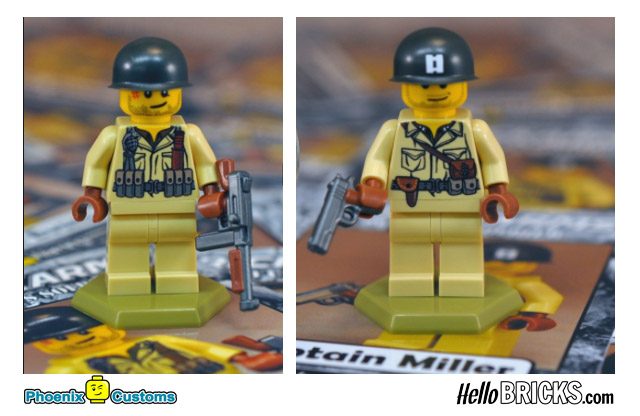
Exclusive interview with Adam, founder of Phoenix Customs, who kindly answered our questions about an exciting side of the LEGO universe: the custom minifigures. Let’s discover the origin story of his passion and the impressive work behind the creation and production processes!
HelloBricks: Hi Adam, you have been creating custom LEGO minifigures for a long time now, but how did everything begin? When did you create your first custom minifigure?
Adam: I have always loved LEGO. When I was a kid, I remember being amazed at the things my older neighbor boy could build, the most memorable being a complete replica of the Olympic Stadium in LA for the Olympics. Funny enough, it was also the first time I did “custom” LEGO, technically, when he asked me to help paint all his blank LEGO figures into athletes from different countries.
From that day on I was hooked. As a kid, all we had in the 80s to look forward to in terms of themes were Space, Knights, and Pirate themes – the Pirate Ship being the best LEGO set ever given to me (thanks Santa!).
HelloBricks: So you were very young when you started to produce custom LEGO minifigures?
Adam: I don’t remember when I fell out of playing with LEGO, exactly, but it was similar to other AFOLs – probably somewhere in my early teens. While I always took a distant peek down the LEGO aisle at stores from time to time, I didn’t really get back into it until I was an adult (30s). Then, it was my kids who got my interest started again.
I think this is asking me why I got back into LEGO and it came when I first laid my eyes on a Darth Vader minifigure while passing the LEGO aisle with my daughter in a store. I couldn’t believe they had done it, blended two of my childhood loves into one – LEGO and Star Wars, I had to have one! I started paying closer attention to that theme’s releases, picking up little sets here and there that I would share and build with my daughter. From then on I was back into LEGO, but at that point just to enjoy it with my daughter. It wasn’t until I found a love of designing custom LEGO that it really became a passion in my life again.
HelloBricks: What did trigger this passion for customization?
Adam: The turn to becoming a customizer started when my daughter asked me while we were playing if I could make her into a LEGO figure – along with a couple of her favorite TV characters. So, I thought it probably was possible so I Googled around and found Eurobricks, which is this great online LEGO fan forum.
There I found terrific tutorials on how to do decaling and how to create your own Lego decals on the computer. Being someone who loves to learn new tricks and trades, I dove into free computer based design programs – specifically Inkscape, which I still use from time to time today. Being a perfectionist, and seeing some of the fantastic decals some of the community members were creating made me unhappy with my early designs and take time to learn what makes a design look “LEGO-like.”
HelloBricks: And how did you learn these specificities?
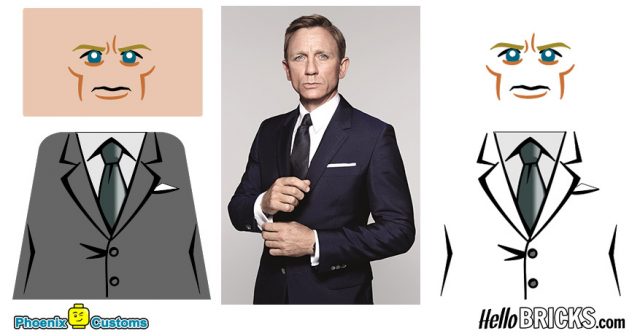
Adam: So, at night after my daughter would go to bed, I would download straight-on photos of my favorite LEGO designs I would find in Google searches (usually LEGO’s own pictures) and I copied them in Inkscape – tracing their lines and recreating them on my own. Doing that was a form of apprenticeship that taught me the spacing between the LEGO eyes and their shapes, taught me the different thicknesses of LEGO’s lines on their designs, the different manners in which minifigure’s mouths are shaped, etc.
Through practice, I felt I was understanding the “rules” and where I felt LEGO could make improvements. For beginners, this Eurobricks’ thread is a great resource for you to get started.
Then, I took the leap and started making designs that people would request on Eurobricks’ Custom forums, and get feedback from the community on those. Soon, I had come up with my own design style and people were giving me very positive feedback. These designs were made to use as decals for anyone wanting to customize their LEGO and I just posted them for free. From those designs, I got the attention of a major customizer that would change my path as a LEGO customizer forever.
HelloBricks: What did push you to start your own company?
Adam: I can’t quite remember how it started, but soon Will Chapman, the owner and creator of BrickArms, and I began chatting up how to make some new decals for his figures, as he was a huge fan of my creations.
While I was working on those, he talked me into starting my own minifigure company so I could share my creations with the world. With his little nudge, I began investigating what went into custom printing minifigures, and the rest is history. Now I’m in my 7th year of customizing and my company, Phoenix Customs LLC, is just entering its fourth year of existence.
HelloBricks: What is your creative process? What are the main steps before getting the customized LEGO minifigure?
Adam: The process I go through when designing a figure starts with inspiration – what looks like it would be cool to me as a minifigure. If it’s not interesting to me as a possible figure, no matter how much people want it, I’m not gonna invest hours and hours designing something if I don’t like it too.

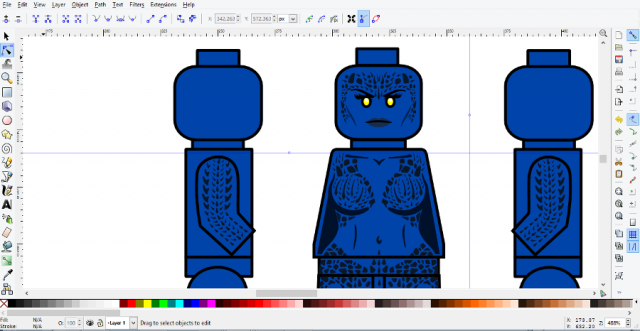
Then, I usually sketch it out on paper with minifigure outlines printed. That way I can work out how the design elements will fit and work out some problems early on. I’m not much of a sketch artist, so my work isn’t pretty, but it gets the proportions and ideas of the design for me to look at. From there, I open my design software (either Adobe Illustrator or Inkscape) and try to translate my work onto a premade template or outline of a figure that I’ve created and refined over the years. I use these programs because they create vector designs that create much smoother lines for printing. If you are making designs just for decaling, you don’t really need Inkscape or Illustrator. But, if you ever plan on getting them printed, you absolutely must learn to use those programs. Printers won’t work with anything else (and designs won’t look as clean when they are printed).
HelloBricks: It seems quite complex! What piece of advice could you give to someone willing to produce custom minifigures?
Adam: Another thing I tell all people asking for advice is to NEVER be happy with your first iteration of a design. Let it sit for at least a few days – where you just evaluate it, see if you think anything isn’t as good as it could be, aske people you trust to give you feedback. I’ve never printed a design I just finished on my first go, as I’ve seen some of those designs and they look horrible! While a design is never going to be perfect, many issues in the design will be resolved if you work on it over time.
I’ve seen some customizers who try to get things out quickly and you can tell they didn’t really let the design take its time and get revisions. And these most often end up terrible. Take your time and make sure you improve it through self reflection on the design and getting constructive feedback. It will make your figures that much better in the end. There are characters that I’ve been working on for years and still improving. (Note: To give you an idea, I finally was happy with the design of my Night Crusader design after 4 years of constantly tweaking it and released it for presale back in November)
HelloBricks: And technically, I guess you follow a very specific process?
Once I am happy with the design, I go back and prepare the design for pad printing. If you are not familiar with the process of pad printing, see this video here to show you how it works generally: http://www.epsvt.com/support/generalIssue.cfm?issID=15
HelloBricks: Before going further, why did you choose pad printing? It is clearly not the easiest solution!
Adam: I choose pad printing over UV digital for the simple fact that when standing next to official LEGO figures, you can see which one is digitally printed. UV printed figures leave a kind of shiny extra layer on their figures (even the best ones like Onlinesailin and Leyilebrick have this occur). For that reason alone I choose the more expensive route, pad printing.
My company’s philosophy is to create figures that seamlessly integrate into people’s normal LEGO collections. In order to do that, I need to mirror LEGO as much as possible in quality and design. So, because LEGO uses pad printing, I choose to use that format as much as possible, as well. One important note though, I believe both formats create beautiful figures – and I collect and make figures from both printing formats. It all comes down to the quality of the printer printing the figures and the designs themselves that create great figures. So, I wouldn’t say one is “better” than the other – I just prefer one over the other because it mimics LEGO’s printing more accurately.
HelloBricks: Thanks, let’s go back to your production process!
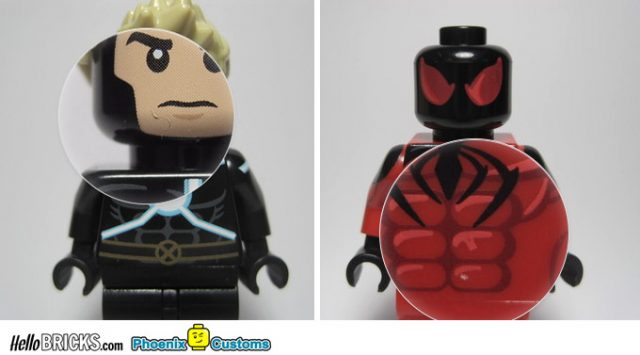
Adam: Basically, your design is broken up by its colors and etched into different plates (one plate for black, one plate for red, one plate for white, etc.) – metal or hard plastic. Most printers can only go up to 5 colors, so there is usually no more than 5 plates at a time for each print location (like a front torso, back torso, arm, front head, back head, front leg, or side leg – sometimes side head). Along with that, the darkest colors go on top, the lighter go on the bottom. So, the printer prints the whites first and blacks or metallic colors last (see attached images). Because of this, I need to make sure I have separated out the design by color and put them in order, darkest on top. I do this by creating different layers in the design file for each color by print location. That allows me to see if anything is covering up any aspects of the design in the lighter colors (is a black line actually covering up a white colored detail?) and correcting it.

Once I do that, I begin to transfer my colors into Pantone colors (which the pad print ink colors are based on). I use a Pantone color chip booklet to give me what those color look like in real life and match those to the colors I want on the screen.
From that point, I send the design file to the printer (along with my parts) and they create the plates from the layers of color in the design file. I prefer to do a test print of each print location to check to see if there are any issues (as I’ve never had one come back without at least one issue to fix).
Most often it’s a color issue (say a green isn’t coming out the right shade on a black part, for example), but sometimes it’s a placement or design issue that needs to be fixed. This saves lots of money in that the final print doesn’t come out until I am sure there are no possibilities for errors.
HelloBricks: How do you get the parts for your custom works? Where do you purchase them?
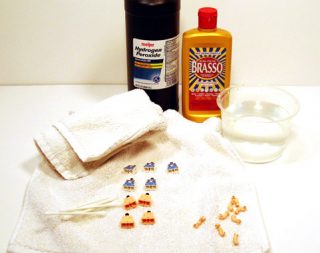
Adam: I purchase almost all my parts from either LEGO’s Bricks and Pieces directly, or from Bricklink.com or BrickOwl.com. In the beginning, I would buy a handful of the cheapest of whatever colored part I needed and clean the torsos individually on my own using simply a towel with dense fibers and some Brasso (purchased from any hardware or supply store).
Now that my company has grown and we print larger amounts and more often (and because my real world job takes more of my time), I have different vendors I purchase from to get my parts and people I pay to clean the parts more professionally.
After those test prints are approved and everything looks good, we go to full production prints. I have set it up with my printer to add one last element of proofing, where they send me a photo of crucial print areas (mostly the head, but often other difficult areas like side legs to make sure they align with the front leg print, etc.). Once I approve, they are printed and shipped to me.
HelloBricks: After all these explanations, it definitely seems intimidating to start this kind of adventure. Is it that complex and expensive?
Adam: My biggest suggestion for anyone doing pad printing for their custom work, there are two things to consider. First, do you have the money to do it? Pad printing companies usually require large quantities to print (in order to pay for the person running the machine and pay for the machine being run), so you have to pay usually between $1,000-4,000 for a print run, depending on the amount of print locations and plates that have to be made. So, if you can’t gather that amount of money, you should instead consider doing your figures in digital UV printing with someone who specializes in printing LEGO (like eclipseGrafx, poppunkmonkey (on eBay), Fig-Factory, or The Minifig Co., etc.).
That format allows to print a smaller number of parts and it costs less. This also means, you will risk less if the printed figure is not well received. I always suggest for new customizers to start with digital figures, and move onto pad printed figures once you’ve earned enough from your first few minifigure sales. It’s much easier to scale up that way, if you decide to go to pad. My second suggestion is to be sure that you take the time to find the right printer. Be sure to ask for samples of their print quality on abs type plastic (which any good printer would be glad to send to get business) and see if you like their results. Evaluate how they are to work with. Will they return your communication in a timely manner? Are they polite and professional? Do they stick to their promises? If not, you might want to find someone else. Believe me, you do not want to work with people you can not trust or do not feel comfortable with.
HelloBricks: We discussed a lot about creation and production, so the next logical step is the sales process: how do you sell your minifigures?
Adam: The approach that I have adopted since Arachnid Hero (V1) for selling minifigures is a three stage approach overall. The first phase is the presale phase. I release a presale of the figure using a digitally accurate render of the minifigure for people to see how it will look from all angles – so they trust what they are buying. This is done to raise funds to go to print (I have a predetermined amount I need to raise – if it isn’t met, the figure would not be printed – luckily with the wonderful support from my fans and customers, I’ve never had a figure not make it’s quota). The benefit of the presale for my customers is threefold: a) they get the figure at a much reduced rate, b) they get the figure earlier than everyone else – which guarantees them one, and c) they help bring a design they want to life by supporting the presale. For me, it allows me to both raise funds for printing a design, but also get a sense of the figure’s demand and interest in the collecting community. One note, this funding is added to a pre-existing amount that was already taken from a previous figure’s profits – so to raise ALL the funds from presales is not a realistic target.

You need pre-existing funds or it won’t get printed, especially given the cost of pad printing. Then, if the figure makes its quota, we go to the next phase, which is to take preorders from my resellers. Once I receive that, I know generally how many I should print. Then, the last phase is the official release phase, where I ship out the presales figures a week before the rest are placed on the website. I then take the remaining figures and sell them at retail price on my website for everyone else. I take orders from all over the world and can ship to just about anywhere, so it is not just a US sale, it is available at all stages to most customers anywhere.
HelloBricks: Thank you Adam, it was very interesting! One last question: what are your plans for this year?
Adam: I have no plans – I go where my inspiration and people’s suggestions take me, haha! There’s no plans. But, I do have plans to stray from my usual areas of focus for a few figures this year… stay tuned !
We hope that this interview enlightened you on the exciting world of LEGO custom minifigures. If you want to see more of Adam’s custom minifigures, you can visit Gnaat’s Flickr gallery. And if you are interested in getting some of these, here is Adam’s website: http://www.phoenixcustombricks.com/minifigures/